How Do I Access Bulk Data Google Reviews
By Adela D. Louie, Terminal updated: Jan 21, 2022
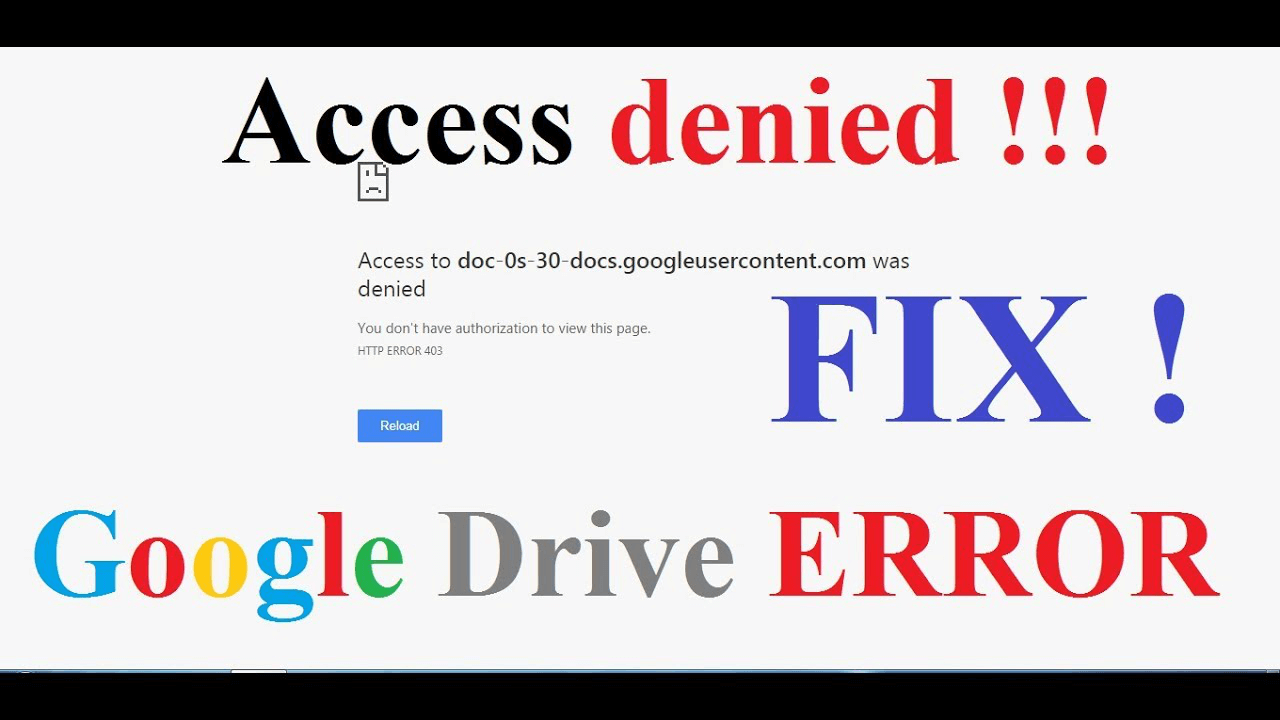
Accept you always encountered an error bulletin on your Android device that says "Google Drive Admission Denied"?. If so, then we bet that it is frustrating correct?
Well, you practice non have to worry anymore because, in this article, we are going to prove y'all how you lot can fix this fault that you are getting on your Android device.
Also, we are going to give y'all the best alternative way for yous to backup all of your information from your Android device and too as on how you can restore them using just 1 software.
Earlier We Set up Google Drive Access Denied Issue:
Having focused on coding programs for Android devices, we've created a tool to be the best alternative to Google Drive.
Cheque this tip: Download FoneDog Android Data Fill-in & Restore to fill-in your data and even restore those data to whatever Android device. If you still want to give Google Bulldoze a chance, nosotros have gathered some great ideas and mutual solutions to this situation below.
Android Data Fill-in and Restore Selectively backup Android information to figurer with i click. Encrypt your fill-in files. Uniform with 6000+ Android devices. Free Download Free Download 
Role 1: What is Google DrivePart 2: Why Do I Go Error Google Bulldoze Admission Denied And How Do I Set ItPart 3: The Best Culling Way for Google DrivePart four: Conclusion
Part i: What is Google Drive
Google Drive is ane of the best deject storage services that every Android user accept for them to store all of their important data such as their photos, videos, and more.
The main purpose of having Google Drive is for you to expand the style yous store your important files to a cloud storage rather than using all of your Android device's storage. Once that y'all have this, Google will exist giving you a 15GB free cloud storage when you sign upwardly.
The Google Drive will allow you lot to store all of your photos, videos, pdf files, and more from your Android device or even from your PC. Yous volition be able to also salvage some of the e-mail attachments that were sent to you using your Gmail and then information technology goes straight to your Google Drive.
I of the things almost Google Bulldoze is that it volition allow you to preview the files that yous accept when yous use your browser without having the demand to download them. This fashion, y'all will exist able to see all the files that y'all have and just only select those that yous desire to download.
Part 2: Why Do I Get Mistake Google Drive Access Denied And How Do I Fix It
There are actually a lot of reasons as to why you are getting an error message whenever you are trying to access your Google Drive. That is why nosotros have hither some tips that can help you to proceeds admission to your Google Drive as shortly as possible.
V Solutions to Gear up Google Drive Access Denied
Here are five main solutions to fix "Google Drive Access Denied" error on your device:
- Check Google Drive Status
- Make Employ of A Different Browser
- Clean Your Caches and Cookies
- Sign Out Other Google Accounts That You Have
- Try to Use Incognito or InPrivate Mode
Tip one: Cheque Google Drive Status
One time that the Google Bulldoze is down, so that is ane reason every bit to why yous will not exist able to access any of the files that you have. For y'all to know the condition of Google Drive, yous tin can go ahead and cheque in the G Suite Status Dashboard.
Tip 2: Make Use of A Different Browser
There are instances that the error bulletin "Google Drive Admission Denied" tin be solved when you make use of different spider web browser.
What yous need to do is for you to endeavour logging in your Google Drive account on a unlike browser. Yous can besides try to log in or admission your account using a unlike Android device such as using a tablet.
People Also ReadHow to Set up Google Bulldoze Network Mistake ProblemHow to fix Google Bulldoze Does Not Sync Issue?
Tip 3: Make clean Your Caches and Cookies
Getting your cookies and cache cleaned up on your browser is one of the most helpful things that you lot should do on a regular ground. This way, you volition exist able to preclude formatting and other loading issues on your PC. This is also one mode for you to exist able to admission your Google Drive. Here is how to do this on your browser.
Step 1: Go ahead and click on the symbol located at the upper right of your screen.
Pace 2: After that, become ahead and click on "More Tools".
Pace iii: Then go ahead and cull "Articulate Browsing Data" so cull on "All Time".
Step 4: After that, get ahead and choose "cached images and files" and and so choose "Cookies and other site information.
Step 5: After that, get ahead and click on "Clear Data".
Tip four: Sign Out Other Google Accounts That You Have
One time that you have encountered the mistake message "Google Drive Admission Denied" when you are signing in using multiple accounts, then what you need to do offset is for you to make certain that you lot are signed in to your Google account.
After that, go ahead and endeavor to consider on signing out other Google accounts that have the files that y'all want to have.
Tip 5: Try to Use Incognito or InPrivate Fashion
The incognito or InPrivate mode will allow y'all to be able to scan without having your activity existence remembered. This is also one style for you to exist able to fix the problem that you take with "Google Drive Access Denied". Here is how you tin practice it.
Step one: Go alee and click on the "Customize and control Google Chrome" which is located at the upper right section of your screen.
Stride ii: After that, become ahead and choose " New Incognito Window" using your Google Chrome browser.
Step 3: And then, become ahead and click on the "…" icon located at the upper left section of your screen and and so choose "New InPrivate Window" if you are using Cyberspace Explorer.
Step 4: From in that location, go ahead and log in to your Google Drive.
Part three: The Best Alternative Style for Google Drive
Aside from using your Google Drive for you lot to save your important files or data that you have, there is as well some other dandy alternative that you tin can apply.
This is a third-party program that y'all tin use for you to backup all of your information and likewise as restore them on whatever Android device. This is no other than the FoneDog Toolkit – Android Data Backup and Restore.
Costless DownloadGratuitous Download
The FoneDog Toolkit – Android Data Fill-in and Restore will be able to assist you in backing upwards the of import information that yous take on your Android device to your PC with 1 Click .
Bated from that, information technology has as well the power to fill-in all of your Apps and as well as your App Data. It can besides allow you lot to preview and restore your fill-in file to any Android device that you have and fifty-fifty to the device where you got the fill-in.
Also, the FoneDog Toolkit – Android Data Fill-in and Restore is compatible with over 8,000 Android device so you do non take to worry well-nigh any compatibility issues.
The FoneDog Toolkit – Android Data Backup and Restore can likewise allow y'all to hands view the content of your Android backup and and so have them restored selectively.
Information technology is as well a 100% prophylactic to utilize. So if you desire to know on how yous can fill-in and restore your information from your Android device to your PC in the easiest and fastest way using the FoneDog Toolkit – Android Data Fill-in and Restore, here is what you need to do.
*Backup Data From Android Device to PC Using FoneDog Toolkit – Android Data Fill-in and Restore*
Pace ane: Download and Install
Get to our official website and have the software download and installed on your PC. If this is the very first fourth dimension that you are going to download and install the program, then you have the option to try out the program for 30 days absolutely for gratis.
Free Download Gratis Download
Step 2: Launch FoneDog Toolkit
Once that you lot accept successfully installed the software to your PC, go ahead and launch it. Here, y'all have to make sure that there is no other backup application running in the groundwork aside from the FoneDog Toolkit.
Step three: Connect Your Android Device and Cull an Option
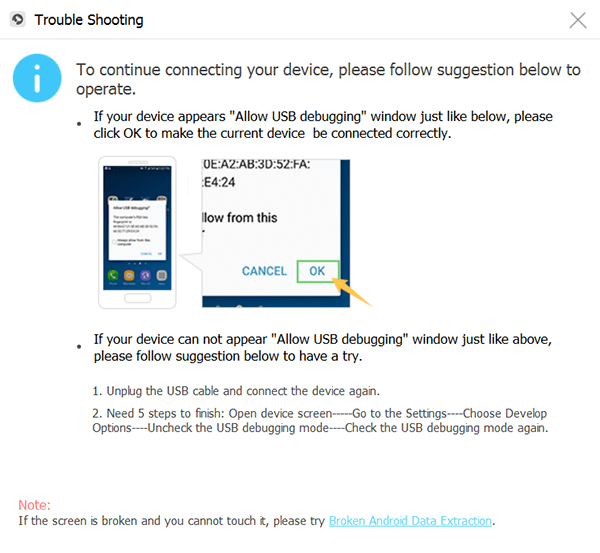
Once that you accept launched the FoneDog Toolkit on your PC, go ahead and connect your Android device to your PC using your USB cable. Make certain that you have enabled USB debugging on your Android device for the plan to be able to recognize completely your device.
If you are using an Android device that is running on an Bone version of four.0 then a popular-up window will appear on your screen asking you to allow USB debugging.
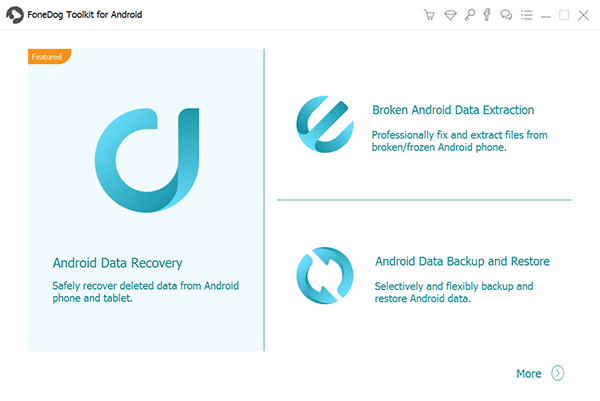
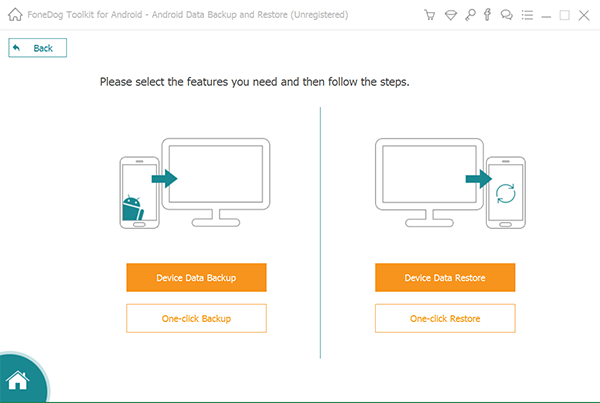
Now, on the main interface of the programme, go ahead and choose the option that you want to do. In this case, go ahead and choose "Android Data Backup and Restore".
Step 4: Select Your Backup Option
Once that the FoneDog Toolkit was able to detect your Android device, go ahead and choose on "Device Data Backup" option. The FoneDog Toolkit – Android Data Backup and Restore will and so choose all the files types past default but you lot can nevertheless have them selectively choose those files that you lot only want to fill-in.
Step 5: Choose the File Type You Wish to Backup
On this step, you volition at present be able to choose the file types that you want to back upward. You can choose the files past clicking on the checkbox abreast each file. Once that you are washed choosing the files that y'all want to fill-in, go ahead and click on the "Starting time" button.
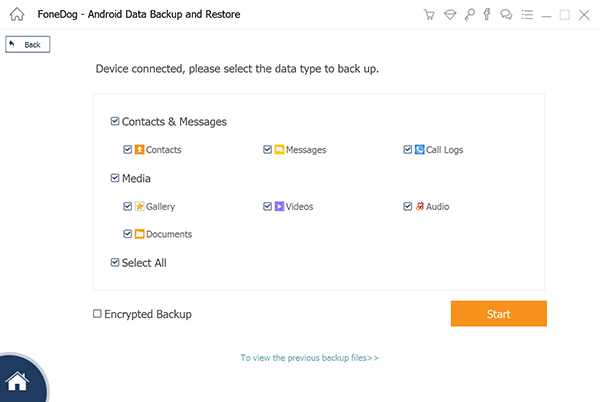
And so, the FoneDog Toolkit – Android Data Backup and Restore will then start scanning all the items that each folder have. This process may take some fourth dimension so just be patient and wait. Also, make sure that y'all do not disconnect or use your Android device during this procedure.
Footstep 6: Backup Complete
In one case that the FoneDog Toolkit – Android Information Fill-in and Restore is done with the procedure, then get alee and click on the "OK" button. From hither, you volition be able to view the content of each file that you lot have backed up and had them restored in a subsequently time.

*Restore Backup File From PC to Android Device Using FoneDog Toolkit – Android Information Backup and Restore*
Step ane: Launch and Connect
Go ahead and launch the FoneDog Toolkit on your PC and then have your Android device connected using your USB debugging.
Step ii: Choose Option and Cull Backup File
One time that the FoneDog Toolkit successfully recognized your Android device, go ahead and choose the "Device Information Restore" pick. After that, the FoneDog Toolkit – Android Data Backup and Restore volition show yous all the fill-in files that you take.
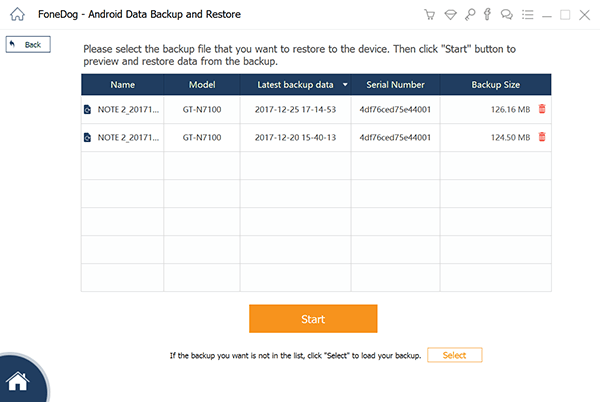
From that list, go ahead and choose the most recent fill-in file fabricated. You lot can base of operations it from the time and data included beside each file. Once that y'all have chosen the backup file, get ahead and click on the "Offset" button.
Step 3: Select Data Type to Restore
Once that you have clicked on the Start button, the FoneDog Toolkit – Android Information Fill-in and Restore volition so showtime scanning your backup file. Once washed with the scanning process, all the file types that the backup file contains will announced on your screen.
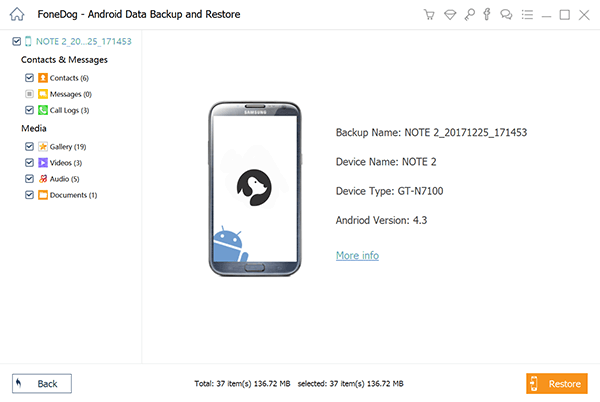
From that listing, get ahead and choose the data type on the left side of your screen and and so click on the "Restore" push. The restoration process volition so start. Here, yous have to make sure non to disconnect your device or not to use it. This process may take a few minutes.
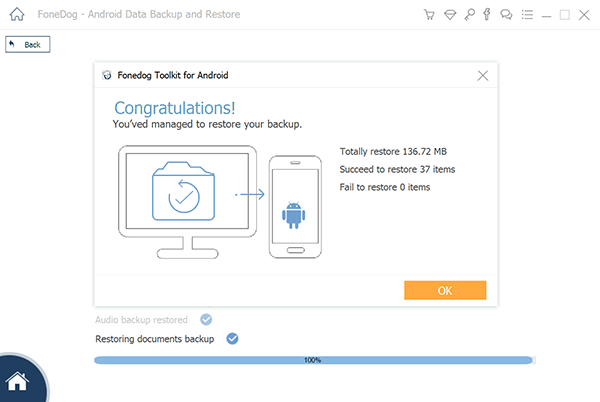
Step four: Backup Restored
Once that the restoration process is complete, the FoneDog Toolkit – Android Data Backup and Restore volition so notify you. And y'all are done!
Part 4: Conclusion
Clearly, having Google Bulldoze is ane of the near useful things that we can have. This is because it serves equally our cloud storage wherein you can store all of your important file and data from your Android device or even from your PC.
Nonetheless, just like any other cloud storage, in that location is some point that it will not work and y'all need to get the manner on how you lot can fix it.
Luckily, we take the FoneDog Toolkit – Android Data Backup and Restore that you can use as the all-time alternative to your Google Bulldoze. This programme will allow you to fill-in all of the important data that you have on your Android device as well equally your important files.
Using the FoneDog Toolkit – Android Data Backup and Restore volition likewise be able to restore any backup file that you have on any Android devices that you have as it can support more than viii,000 Android devices. Having this program will definitely brand everything easier.
Free Download Gratis Download
Source: https://www.fonedog.com/android-data-backup-restore/google-drive-access-denied.html
0 Response to "How Do I Access Bulk Data Google Reviews"
Post a Comment